Positioning Areas
So far, you’ve been placing objects on the whole page. But real layouts usually have distinct regions – a header, a sidebar, a main content area, maybe a footer. XTS handles this with positioning areas: named regions of the page that each have their own grid and cursor.
Defining areas in a master page
Areas are defined inside <DefineMasterPage> using <PositioningArea> and <PositioningFrame>:
<Trace grid="yes"/>
<SetGrid nx="19" ny="28"/>
<DefineMasterPage name="page" test="true()" margin="1cm">
    <PositioningArea name="pagehead">
        <PositioningFrame width="19" height="2" row="1" column="1"/>
    </PositioningArea>
    <PositioningArea name="left">
        <PositioningFrame
            width="4"
            height="{sd:number-of-rows() - 3}"
            row="4"
            column="2"/>
    </PositioningArea>
    <PositioningArea name="text">
        <PositioningFrame
            width="10"
            height="{sd:number-of-rows() - 3}"
            row="4"
            column="8"/>
    </PositioningArea>
</DefineMasterPage>
This creates three areas: pagehead, left, and text. Each has a position and size defined in grid cells.
Placing objects in areas
Use the area attribute on <PlaceObject> to target a specific area:
<Record match="data">
  <PlaceObject area="pagehead">
    <TextBlock>
      <Paragraph>
        <Value>Page header, height: </Value>
        <Value select="sd:number-of-rows('pagehead')"/>
      </Paragraph>
    </TextBlock>
  </PlaceObject>
  <PlaceObject area="left">
    <TextBlock>
      <Paragraph>
        <Value>Sidebar, height: </Value>
        <Value select="sd:number-of-rows('left')"/>
      </Paragraph>
    </TextBlock>
  </PlaceObject>
  <PlaceObject area="text">
    <TextBlock>
      <Paragraph>
        <Value>Main text, width: </Value>
        <Value select="sd:number-of-columns('text')"/>
      </Paragraph>
    </TextBlock>
  </PlaceObject>
</Record>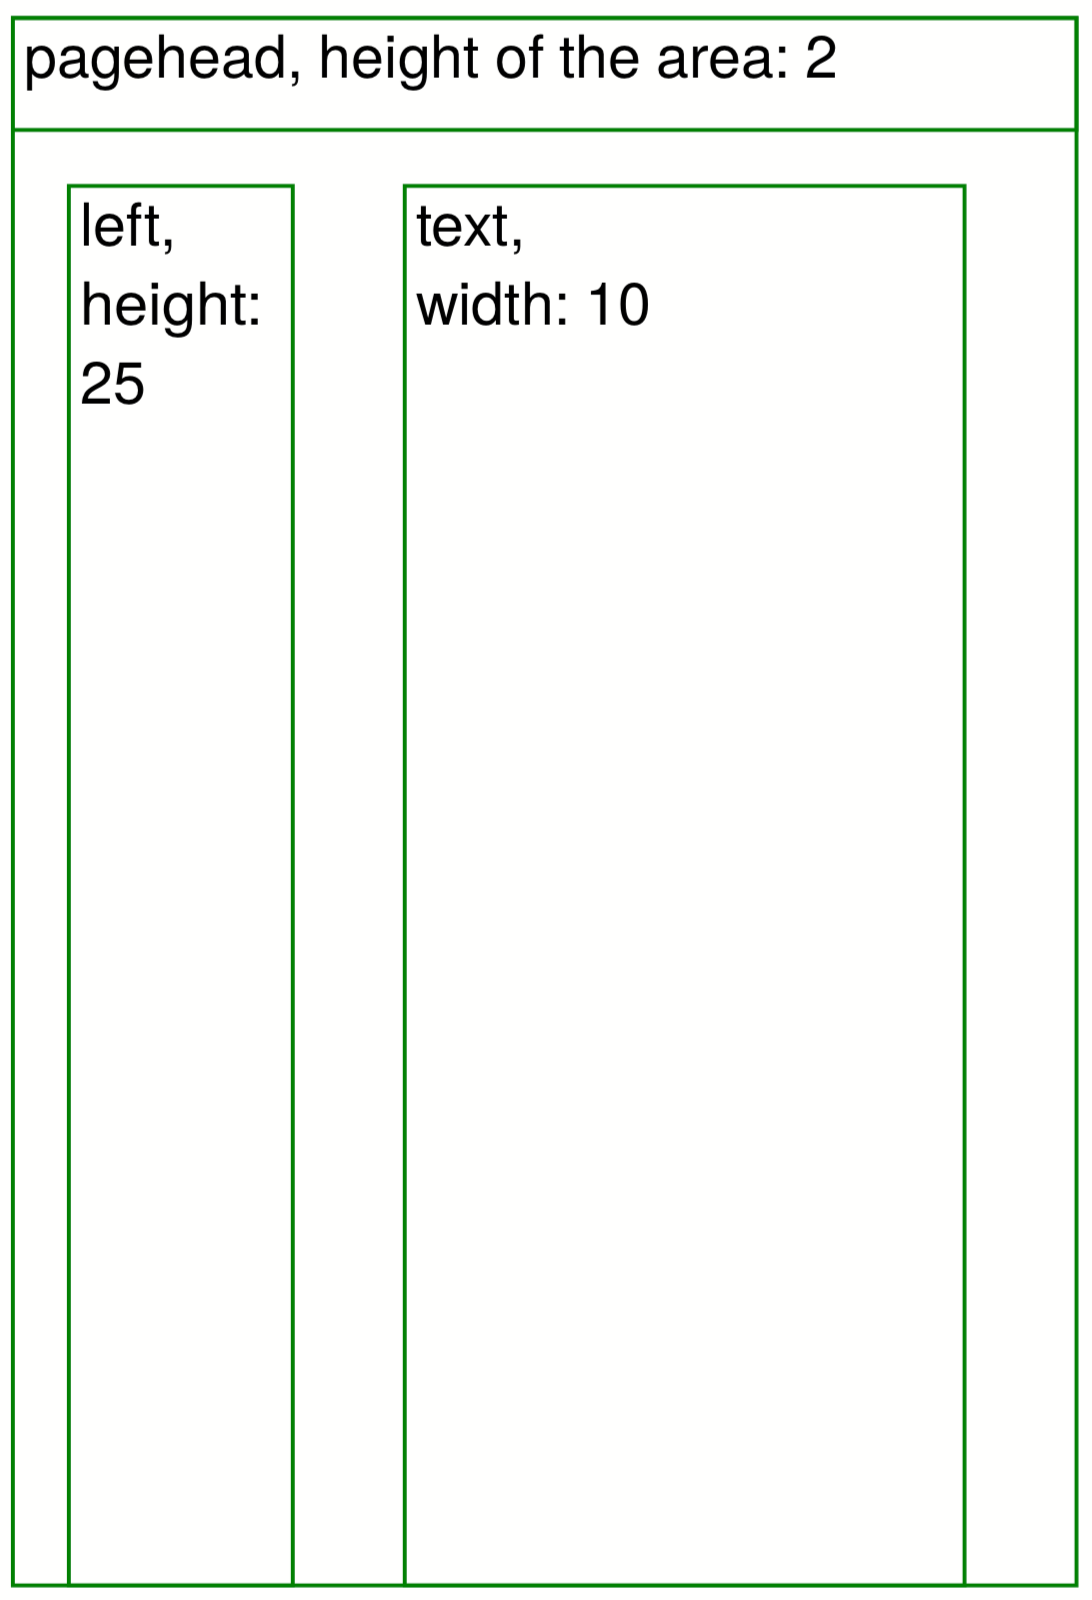
sd:number-of-rows() accept an area name.The cursor
Each area has its own cursor – a virtual marker that tracks where the next object will go. When you place an object that fills the full width of an area, the cursor automatically moves to the next row. Placing something narrower moves the cursor to the right.
Key points about the cursor:
- Each area’s cursor is independent.
<NextRow>moves the cursor down. Userows="n"for relative movement orrow="n"for absolute.- After a full-width object, the cursor wraps to the next line automatically.
<Record match="data">
    <PlaceObject>
      <Box width="{sd:number-of-columns()}" height="1"/>
    </PlaceObject>
    <NextRow rows="1"/>
    <PlaceObject>
      <Box width="{sd:number-of-columns()}" height="1"/>
    </PlaceObject>

    <NextRow rows="2"/>

    <PlaceObject>
      <Box width="4" height="1"/>
    </PlaceObject>
    <NextRow rows="1"/>
    <PlaceObject>
      <Box width="4" height="1"/>
    </PlaceObject>
</Record>
Multiple frames per area
An area can have multiple frames. When the first frame is full, content flows to the next one. If all frames are full, a page break occurs and XTS continues in the first frame of the same area on the new page.
Forcing a frame switch
Use <NextFrame> to jump to the next frame in an area:
<NextFrame area="text"/>If there’s no next frame, a new page is created.
What’s next?
You now understand the core layout model. Next up: Text & Styling – loading fonts, formatting text, and using CSS.