Print output / crop marks
A printable PDF usually differs little or not at all from a PDF that is only read on screen. A few points that should be considered for output to a printer:
- Format
-
While today’s screens tend to be in landscape format (16:10 or similar aspect ratios), the usual print page is in portrait format. In the command
<Pageformat>you should specify the desired size (final format). Bleed marks and bleeding can be controlled separately (see below or the command<Options>) - Colors
-
Since printing inks are almost always applied to white paper, they must be indicated differently than on the screen, which makes LEDs light up on a dark background. Care should be taken to define all colors either in CMYK color space or in greyscale mode. It is possible to convert RGB values into CMYK by calculation, but in practice this only works moderately well.
- Images
-
Again, one should take care to only include images in the CMYK color space. The Publisher takes over the images without any changes or conversion into the PDF. This means that the source material should already be suitable for printing.
- Quality (pixel number) of the images
-
Sometimes it is said that only images with at least 300 DPI (dots per inch) should be included. The specification of the DPI number is often nonsensical, as it can be arbitrarily defined in the image. It depends on the actual number of pixels per inch according to the scaling in the Publisher. The Publisher can issue a warning if this is below a certain value (attribute “dpiwarn” see
<Image>). - Fonts
-
The Publisher automatically embeds all used fonts in the PDF (subsetting - only the actually used letters and characters are embedded).
Crop marksPRO
If no special setting is made, the speedata Publisher creates a PDF which has exactly the size of the specified pages.
To switch on bleed or crop marks, these must be activated in the element <Options>:
<Options
   cutmarks="yes"
   bleed="3mm"
  />
These instructions create trim marks that are 1cm long and 3mm from the inner edge of the page (TrimBox). The distance results from the specification at the attribute 'bleed'.
The created PDF file always contains the following boxes: outside is the MediaBox, the bleed is marked by the BleedBox and the actual page is marked by the TrimBox. If no bleed is specified, the BleedBox and the TrimBox coincide. If no trim marks are created, the MediaBox coincides with the TrimBox, so that all three boxes have the same dimensions without specifying trim marks and bleed.
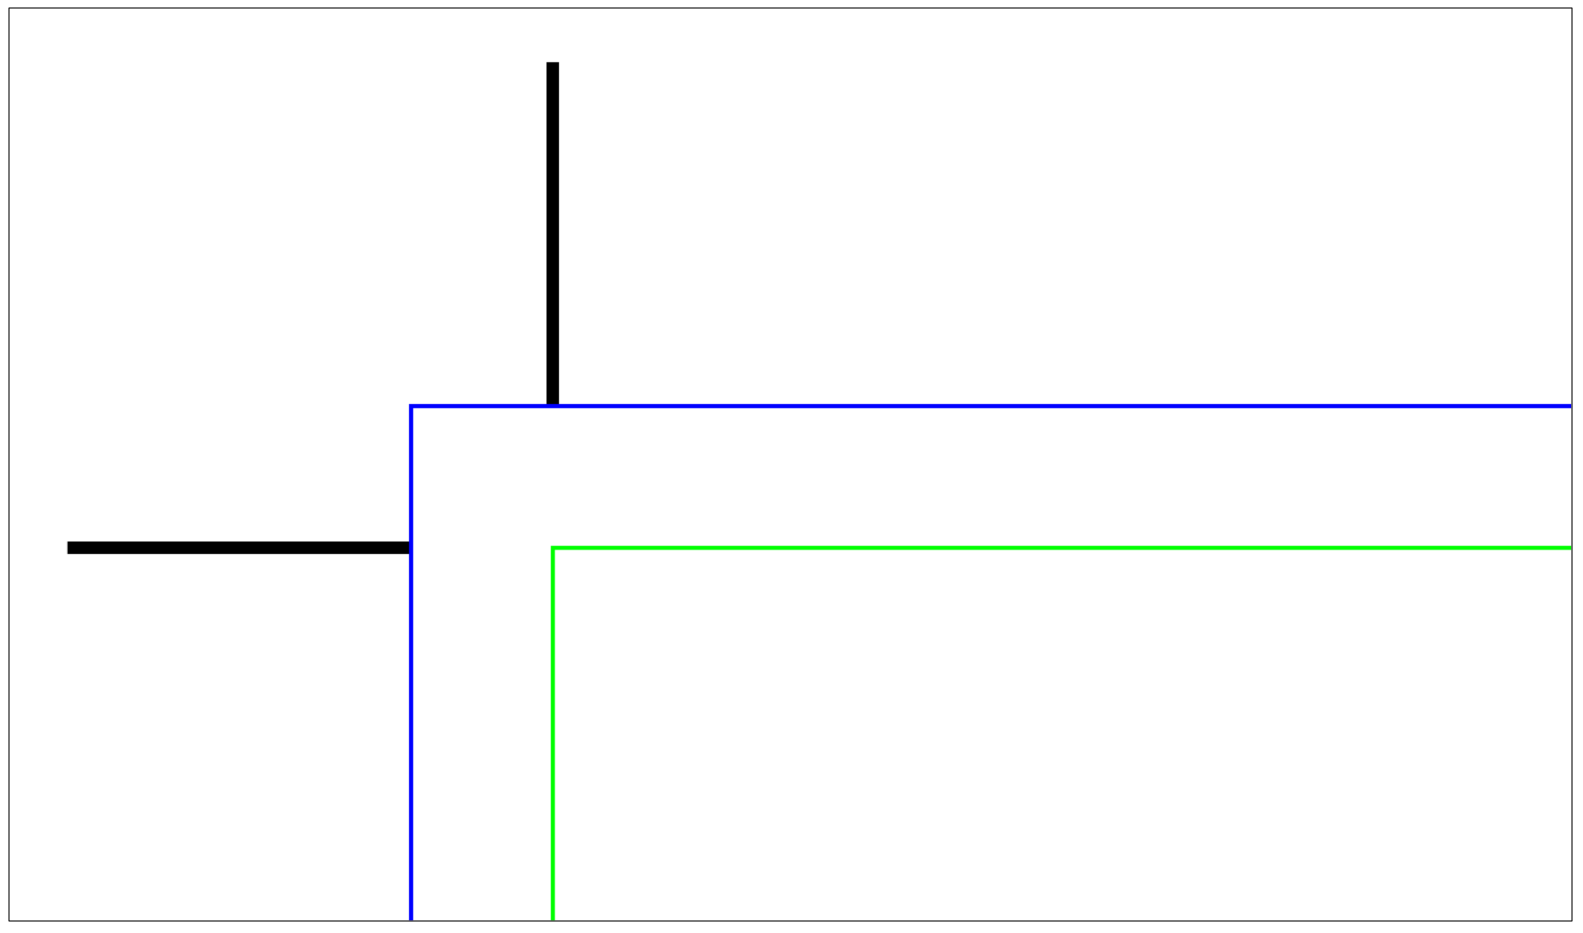
Example
In the example the crop marks go up to the blue line that marks the bleed. The green line shows the final format of the page (screenshot from Adobe Acrobat).
Crop marks and bleed in Adobe Acrobat
The command <PDFOptions> offers the possibility to set preferences for the print dialog in the PDF viewer.
These are only supported by some programs (mainly Adobe Acrobat Reader) and are platform dependent.
|